First, work outdoors on an overcast day. When the sky is a bright dome of gray you have the perfect light for copying flat and dimensional artwork. The Kelvin temperature of light on an overcast day is 5600° (at the longitude if Seattle & Vancouver BC) which is just a tad cooler than perfect (5500°). It's shadowless light as well, so if the original has thick oils with high profiles you won't have bothersome brushstroke or palette knife texture shadows.

At the Vashon studio we have a purpose built outdoor studio which is essentially a deck covered with clear polystyrene Sun Shield panels on a framework of 2X4s.
If your camera is set for daylight (or if you use daylight film) the resulting colors in the capture will be almost acceptable as is. However, by inserting a an 18% gray card in the shot you can get even closer to the 'correct' colors.
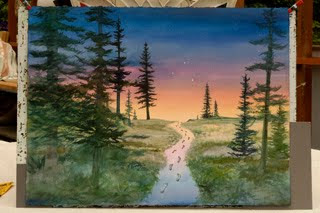
When the image is open in PhotoShop® use the neutral 'eyedropper' tool to sample the gray card in the shot. At an instant, the colors will 'click' right in. Try clicking in a few different spots across the gray card. At Vashon Island Imaging we sometimes put gray cards on two sides and sample both. You will usually see some small differences in the resulting colors. Choose the one that you like best to be your basic image file for prepress work.
The pictures in this article were all taken with a Nikon digital camera set for Kelvin 6950° (Shade). That results in pictures that are warmer (more red) than if the Kelvin was set for 5500°. I prefer warmer tones and therefore have always shot with warming filters. When shooting film I leave an 81A or 81B filter on the lens at all times. Shooting digitally I set the camera for 6800° (sunny days) to 7300° (stormy days). Later I usually pull back on the warmth if needed. Generally I have found that the colors are better if I shoot with too much warmth and then cool it down, rather than vice versa. (Your preferences, devices and systems may be different than mine.) Anyway, the pictures you see here will probably look warm to your eye and that is why. I have not doctored them in any way.
In another blog entitled 'Monitor Blindness' I explain how and why we use both CRT and LCD monitors at my giclée printing company. What follows are comparisons of what you see on these two monitors when the image capture of Jacqui Lown's watercolor painting 'Guided Steps' is prepressed for both giclée printing and for the Web. Notice that if it looks good on one it will not look good on the other. This demonstrates the need to prepress a master image for each individual type of output. This particular picture will grace the cover of a new book by Aimée Cartier entitled 'Getting Answers Using Your Intuition to Discover Your Best Life' (www.spreadingblessing.com) and so we delivered three image files to the client: one for giclée printing and other output using the Adobe 1998 profile, another one for sRGB profile printing and AV output, and a third specifically for Web-centric output like LCD displays and video projection.
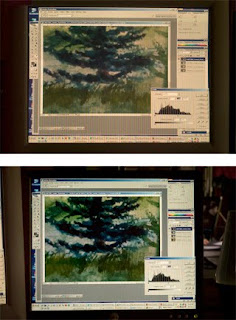
After snapping in the correct colors by clicking on the gray cards next to the lower left and right corners of the Jacqui Lown painting, the next basic prepress adjustment is Levels. In the above picture, Levels have been set using the CRT monitor and the adjustment is made while viewing the original artwork in daylight that is 5500°. The monitor itself should be profiled and set for a temperature as close to 5500° as possible.
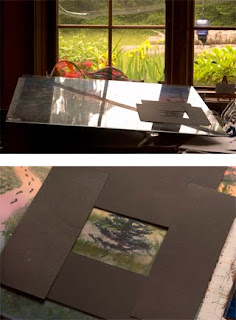
Mask the artwork to show only the same part you are examining on the monitor screen. Select a part of the picture that shows the black point and make the necessary Levels adjustment. Next look for the white point. There may be no white point, as is the case in this watercolor. But there is a while point on the board to which the painting is clipped, as well as the table top. Finally, find an area of 'dominant' coloration in mid tones and set Levels accordingly.
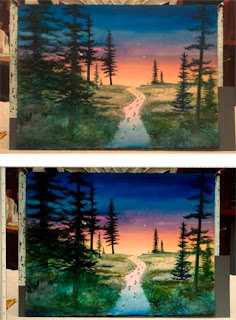
When giclée prepress work is completed on the CRT the resulting image will look quite 'flat' and lifeless but that is intentional because the dynamic tone range of the image has been compressed to 'fit' into the CMYK color space of the giclée printing machine. The same adjustments look lousy on the LCD display. That is why it is not a great idea to do giclée prepress work on an LCD monitor. Notice also that the blues in the LCD are way stronger than the CRT. That is because most LCDs come factory preset for a 'cool' display (Kelvin 9000° or 6500°), so we leave our's set at 6500° to see the 'blue' version of the image that Web surfers will see, and adjust accordingly (see pix at last part of article).
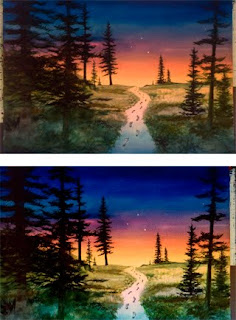
After the basic image work we make a version with punched-up colors that look good in the sRGB color space that many publishing companies want to receive, especially the new print-on-demand shops which use the ink-jet process to make short runs of paperback books. To make that file the prepressed giclée-printing version was copied twice. One had the color adjusted for the reds and oranges in the midsection of the picture. In this case the adjustment was 22 points of red and 22 points of yellow in the 'Shadows' using Image>Adjust>Color Balance. The other had 11 points of blue added to the 'Shadows'. The layer for reds was placed on top of the layer for blues and combined using a center-oriented gradient layer mask. The result can be seen above. You'll have to take my word for it that the CRT version (top) is closer to the original than the LCD.
Finally, to make a version for the Web the CRT is disregarded and adjustments are made to the picture to make it look better on LCD's set for 6500°. Because LCDs are inherently more saturated and contrasty due to their smaller color space, the look of pictures is improved by lowering the contrast. In this case I used Image>Adjust>Brightness and Contrast to lower the contrast by 22 points.
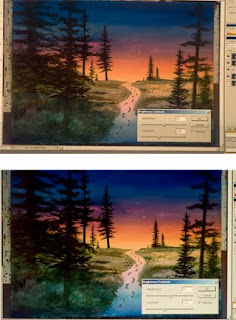
Now it is even easier to see why you should not prepress for giclée using an LCD. When the watercolor looks good on the LCD, check out what it looks like on the CRT (above). Use LCDs to prepress for Web and CRTs to prepress for giclée and other fine printing. For giclée work in the Adobe 1998 color space (if you work RGB) and for most self-publishing work in sRGB. If you usually output only to print, then you should probably be working in CMYK.
Although it's nice to have a fully equipped studio with professional photographic strobes and Gretag-Macbeth controlled-lighting for viewing artwork, such expensive equipment is not necessary for making first class copies of flat and dimensional artwork. Working with natural daylight will work just as well and save you a bundle.


oh Amazing Giclee Printing
ReplyDeletedesigns ..i loved all your blogs :)
Amazing blog on giclee printing
ReplyDelete