The idea for this blog came to me in a flash, literally. It was a brilliant spark of clear red light caught in the corner of my eye as I scanned the horizon. Then another one, blue… then, after a few more seconds yet another… tiny sparks in the distance like the clear faint 'ting' of a distant Buddhist monastery bell in a gentle breeze… each one an invitation to move your attention to something else.
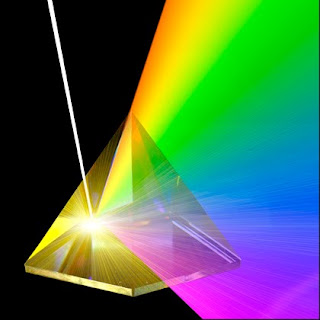
The source of the flashes turned out to be a crystal someone had hung in the window across the way. The crystal was catching the sun and as it slowly rotated its prismatic facets split the sunlight into flashes of light in a rainbow of colors.
Attracted by the beauty of the flashes they gave me pause and I reflected on their brilliance. Soon I found myself thinking about how to capture the effect of the crystal in a giclée print. (Everything I think about eventually evolves (devolves?) into pictures, something that has continued to happen for my entire life. I see pictures everywhere, all the time. Some intentionally, others spontaneously.)
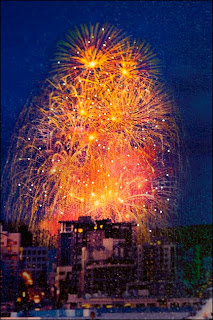
Pondering flashes brought recall of another picture I had seen from the ferry window one sunny morning, of water sparkles. I love to stare into the middle of a patch of water sparkles and just let them tickle my eyes as they burst and disappear like natural 'fireworks'.

Disney® long ago mastered the art of sparkles in animated films and has been widely imitated since with varying degrees of success. But as you are probably already well aware, it is very hard to sparkle magic in a printed picture. The reasons for that are physical and have to due with the nature of light and how we see it. You can't look directly at the sun without blinding yourself, and that is why a picture of the sun lacks its natural 'vigor'.
Reflected vs Source Light

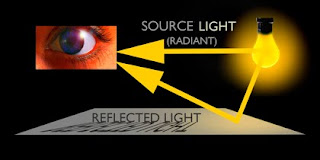
The things our eyes see are illuminated by light. The light radiates from a source and reflects off objects around it. Source-light rays are reflected by natural and synthetic elements in varying amounts, always less than the source light. That is, some reflect better than others. Mirrors reflect 99% or more of the source light that hits them. Black velvet reflects nearly zero source light. A standard photographic gray card used by photographers reflects 18% of the light falling upon it.
Just as you can't look at the sun, it is difficult to look directly at bright lights. The physics in all cases are the same. The amount of reflected light is inversely proportional to the 'spread' of the light. Anyone who has projected imagery is familiar with this. If you double the size of the screen, you quarter the brightness. Common sense would have you think that a screen twice the size would be one-half as bright, but that would be wrong. Photographers encounter the same phenomena when distancing lights from a subject. Pulling a light back twice as far doesn't halve the light, it quarters the light.
If you measure the light falling on a subject with a meter and then turn around and point the meter at the source light you will discover that the difference in the measurable amount of light between the source and the reflection is enormous. That is why you can't use the same camera exposure for each... and why source lights that appear in pictures are usually blown out because of over exposure.
There are many ways to avoid these kinds of problems and many other ways to fix them, all described in my book, Giclée Prepress - The Art of Giclée (www.gicleeprepress.com). However, even if you make a perfectly balanced original image, source lights like the sun will still lack the magic of luster without some prepress work.
Recreate the Natural Light Balance
Recall that it is difficult to look at source lights because their extreme power is out of the range of cameras if their exposure is set for reflected light. You could set the camera's exposure for the sun – people do it all the time. However then the rest of the scene is way underexposed. True, you can combine exposures and/or use fill light to get a balanced picture... but it will still lack the luster of the original scene because now you can look at the sun (or radiant source lights). The sun's energy has been reduced to match that of the rest of the scene. To get back some semblance of 'luster' in a print, radiant lights and spectral highlights must be made to be the only white points in the picture.
Spectral highlights are clear and focused reflections of radiant light sources. For example, the sun reflecting off highly polished metal. Spectral highlights give us visual cues about an objects composition. We know that objects making spectral highlights are hard and polished, or liquid as no other substances produce them.
The simple addition of a spectral highlight to an illustration of a ball provides an example. Without the highlight the ball is perceived as soft. Adding the highlight changes its perceived hardness. The more spectral the highlight, the harder the ball.
Make Spectral Highlights 5% Brighter
To add depth to prints of images containing spectral highlights the prepress work involves the restoration of imbalance to the lighting of the scene. The is done by isolating the spectral highlights and making them 5% brighter with the use of a Highlight Control Mask.
The only way you can make highlights brighter in a print is to make everything else darker, which is exactly what a Highlight Control Mask is all about. There are several procedures for making highlight control masks described in my book and in previous blogs. One very simple way is as follows:
1.) Duplicate the image layer.
2.) Adjust the Levels to darken the image substantially.
3.) Use Brightness and Contrast to further differentiate the highlights.
4.) Desaturate the layer to remove all color.
5.) Set the layer's Opacity to 5% or thereabouts.
Controlling the opacity of the mask layer is how you bring out the spectral highlights in the giclée. It is a delicate balance. If you apply too much mask opacity you can make the print look dull (maybe that is good). At Vashon Island Imaging we normally apply about 5-7%.
Mask looks solid black before opacity change in layer.
You can also use the Eraser Tool to completely or partially remove parts of the mask to bring out the brightness in parts of the picture, if you like.
Inverting the highlight control mask layer into a negative can be done to add color to spectral highlights. Use the brightness and contrast controls to lighten the dark highlights into a mid-range tone and then apply color balance controls to add the color of your choice. Once they have had some color added to them, the tones will also react to hue and saturation adjustments. After getting the color right, adjustments to the brightness, contrast and layer opacity fine-tune the look of the spectral highlights. (See also an earlier blog on the subject of adding color to highlights.)

Adding sparkle magic to your giclées will put a twinkle in your customers' eyes when they see them. Better-looking giclées will also spark your sales... and I'll bet you could use some of that the kind of magic, eh!


No comments:
Post a Comment